1. Simple walkthrough
For the walkthrough, we provide the following workbook: 💾 building masterdata v1 It is a fictitious sample of a workbook used to gather some metadata about a building.
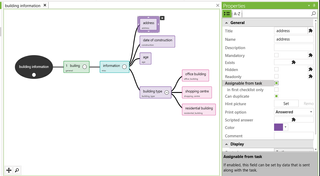
Note, that all of the fields do have assignable from task enabled, which allows us to provide values for those fields via task metadata
To make the walkthrough easier, we recommend to use Visual Studio Code with the REST Client plugin.
Then, 💾 download this .http file and follow along
To prepare for the walkthrough, we
- created a team Tasks Walkthrough and uploaded the workbook
- created a user "gadget" and added him to the inspectors group of the team
- created a service user to authenticate with the API
1. Authenticate with iCL Portal
As we are integrating with iCL Portal, will use a service account and the OAuth 2.0 Client Credentials flow to authenticate. Please read here how to get client credentials.
POST https://dev.iclportal.com/token HTTP/1.1
Host: dev.iclportal.com

grant_type=client_credentials&client_id=fd52e53d-9b5f-405c-8084-052c8dfe08ac&client_secret=cjfdRtrCHKYaLALOvHV/JFhSpId/gtksoSLw1XPkkAo=
This will give us our access_token to authenticate future requests.
2. Create a task
Now, we can create a task to perform the inspection using the workbook "building masterdata".
Running the following query using the query tasks endpoint shows there is no task yet by querying all tasks of the team "Task Walkthrough".
GET https://dev.iclportal.com/api/services/custom/externaltask/getall?$filter=WorkAreaTitle+eq+%27Task+Walkthrough%27
Authorization: asdfBASDF...
This will give us an empty JSON array
HTTP/1.1 200 OK
Cache-Control: no-store, must-revalidate, no-cache, max-age=0
Content-Length: 26
Content-Type: application/json; charset=utf-8

{
  "results": [],
  "__count": 0
}
Now, we can create a task using the tasks POST endpoint to perform the inspection using the workbook "building masterdata".
POST https://dev.iclportal.com/api/services/custom/externaltask/Post
Authorization: asdfBASDF...

{
  "externalId": "2023-OQ-HQ",
  "title": "Inspect OQ-HQ",
  "teamName": "Task Walkthrough",
  "workbookName": "Building master data",
  "isSelfAssignable": false,
  "assignedUserName":"gadget",
  "description": "Some additional information displayed to the user when opening the task",
  "isPublished": false,
  "startDate": "2023-04-05T09:30:44.376Z",
  "dueDate": "2023-04-06T09:30:44.376Z" ,
  "address":"Landstraßer Hauptstraße 101, 1030 Vienna",
  "construction": "1983-02-06T00:00:00.000Z",
  "building_type":"office_building,shopping_centre",
  "age":10
}
Other than the mandatory fields, you can provide additional values that will be used to fill in the fields of the workbook. In this case, we provided
- some text (
address), - a date
constructionwhich must be formatted according to ISO8601 - a number
age - and for the checkboxes, we provided a comma-separated list of values (
building_type)
You can find more information in the docs of the tasks POST endpoint
Given you provided all necessary information, the server will respond with the identity of the task:
HTTP/1.1 200 OK

{
  "result": {
    "id": "7cddb148-c113-4b23-9263-25cc479c88d8"
  },
  "targetUrl": null,
  "success": true,
  "error": null,
  "unAuthorizedRequest": false,
  "__abp": true
}
Even though you could now store this internal or iCL Portal-specific identity of the task in your system to identify it later, we recommend to use the externalId you provided when creating the task.
This can be any string you want, but it must be unique for each task.
Now, run the first command again to see that the task has been created:
Running the following query:
GET https://dev.iclportal.com/api/services/custom/externaltask/getall?$filter=WorkAreaTitle+eq+%27Task+Walkthrough%27
Authorization: asdfBASDF...
now returns
{
  "results": [
    {
      "id": "7cddb148-c113-4b23-9263-25cc479c88d8",
      "externalId": "2023-OQ-HQ",
      "title": "Inspect OQ-HQ",
      "workbookId": "6f9df8f3-1f69-4258-99ad-c1144219bc7c",
      "workbookTitle": "Building master data",
      "workbookVersionCode": 1,
      "assignedUserId": 4,
      "assignedUserName": "Antoine Gadget",
      "description": "Some additional information displayed to the user when opening the task",
      "startDate": "2023-04-05T09:30:44.377Z",
      "dueDate": "2023-04-06T09:30:44.377Z",
      "state": 1, // 1... assigned
      "isSelfAssignable": false,
      "workAreaId": "58b6081a-1154-4ec2-a5a8-271a245eb4e0",
      "workAreaTitle": "Task Walkthrough",
      "isPublished": true,
      "actualStart": null, // once the user starts the task, this will be set
      "actualEnd": null, // once the user completes the task, this will be set
      "sentDate": null, // once completed and all required reports were generated, this will be set.
      "finalReportCount": null, // once sent, the number of final (non-draft) reports that existed at that moment
      "hasTask": true, // this indicates, that there exists a task for this inspection (the json represents both: the inspection and the task)
      "inspectionId": null, // once the user starts the task, an inspection will be created and set here
      "lastModificationTime": "2023-04-03T09:42:18.93Z",
      "inspectedItems": null
    }
  ],
  "__count": 1
}
State 1 means assigned.
Read here to see the full list of task states.
3. Retrieve task information
You can use the externalId you provided when creating the task to retrieve its current data by using the tasks GET Endpoint.
POST https://dev.iclportal.com/api/services/custom/externaltask/GET
Content-Type: application/json
Authorization: asdfBASDF

{
    "externalId": "2023-OQ-HQ"
}
This will return the current tasks details
{
  "result": {
    "externalId": "2023-OQ-HQ",
    "title": "Inspect OQ-HQ",
    "teamName": "Task Walkthrough",
    "workbookName": "Building master data",
    "assignedUserName": "gadget",
    "description": "Some additional information displayed to the user when opening the task",
    "startDate": "2023-04-05T09:30:44.377Z",
    "dueDate": "2023-04-06T09:30:44.377Z",
    "completedDate": null,
    "sentDate": null,
    "finalReportCount": null,
    "state": "Assigned",
    "inspectionId": null,
    "itemsToInspect": [],
    "address": "Landstraßer Hauptstraße 101, 1030 Vienna",
    "construction": "",
    "building_type": "office_building,shopping_centre",
    "age": 10
  },
  "targetUrl": null,
  "success": true,
  "error": null,
  "unAuthorizedRequest": false,
  "__abp": true
}
4. Cancel a task
Now, let's assume that some task cannot be performed, since the data provided was incomplete. You can update the task as long as it is not started (i.e. new or assigned) - otherwise the iCL Portal will respond with an error. But what if it was already active?
In that case, you can cancel the task
POST https://dev.iclportal.com/api/services/custom/externaltask/Cancel
Content-Type: application/json
Authorization: asdfBASDF

{
    "externalIds": ["2023-OQ-HQ"]
}
You can cancel multiple tasks at once by providing all their external ids in the array.
5. Assign/Reassign a task
Once the task has been cancelled, you still cannot update it. For this, re-assign it to a user (it can be the same user again) to set it back to assigned where it will be finally editable.
POST https://dev.iclportal.com//api/services/custom/externaltask/Cancel
Content-Type: application/json
Authorization: asdfBASDF
{
  "externalId": "2023-OQ-HQ",
  "assignedUserName": "gadget"
}
In some cases, it may be necessary to delegate an active task to another user. Say, for example, that the inspector that worked on an assignment went on sick leave.
In this case, you can use the assign endpoint to re-assign the task to another user.
Make sure, though, that the original inspector synchronized all latest changes so the new inspector can continue working on the task.