User interface
Overview
The iCL Designer contains all the tools to create checklist questions, configure workbook behavior and set report templates to create your new workbook or to change an existing one.
User Interface

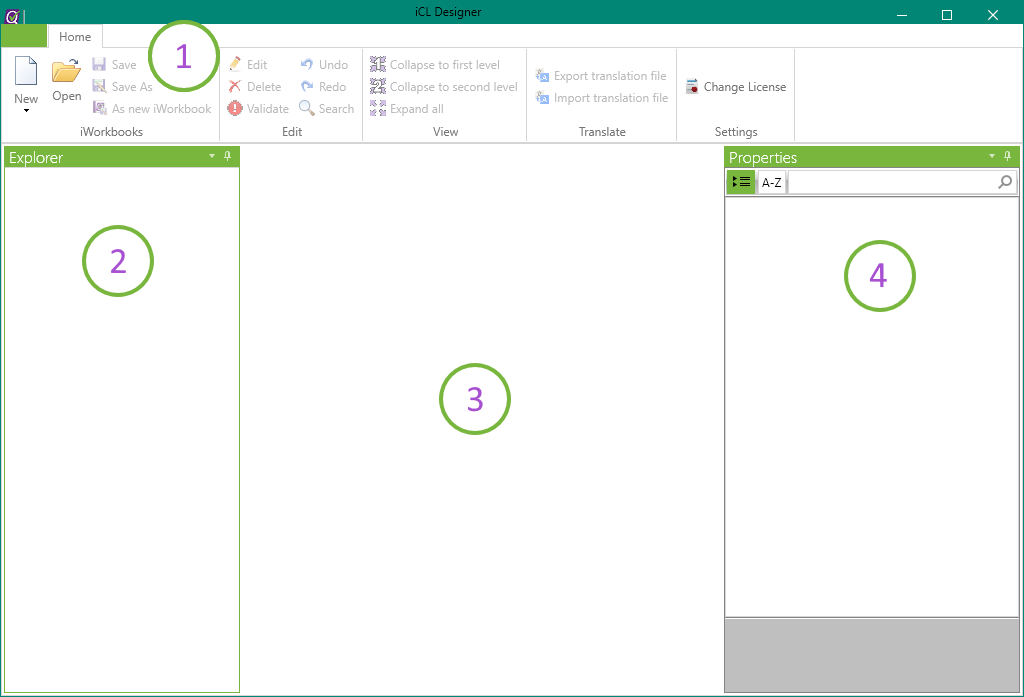
The iCL Designer can be categorized into 4 regions:
(1) the menu bar in the top
(2) the explorer window on the left
(3) the document tabs in the middle
(4) the properties window on the right
Menu Bar
In the menu bar you find the tools to load/save your workbooks, change view settings, export and import translations of the workbooks and more.
iWorkbooks

The following options are available in the 'iWorkbooks' area:
| Name | Description |
|---|---|
| New | With this option a completely new iWorkbook can be created. You can also create other areas using the triangle icon.CTRL+N |
| Open | Opens an already existing iWorkbook. |
| Save | Saves the current iWorkbook. The iWorkbook version is increased by 1. (CTRL+S) |
| Save As | Allows you to save this iWorkbook under a different name. The iWorkbook version is increased by 1. |
| As new iWorkbook | Saves the iWorkbook as a new iWorkbook with a new internal ID and resets the version to 1. |
| Use this option, if you would like to create a brand new workbook, but you do not want to start from scratch, but to use an existing workbook as a starting point. |
If you save a workbook 'As a new iWorkbook', you deliberately cut the version history from the original one. This means the new workbook will not be seen as an update to the original workbook, but as a completely separate workbook. Therefore you'll also not be able to update inspections that were started using the original workbook using this new workbook!
Edit

In this area you will find tools to modify and undo certain actions.
| Name | Description |
|---|---|
| Edit | Allows you to edit a field. This can also be done by clicking on a field itself. |
| Delete | Removes an existing field. This can also be done by clicking on the X symbol next to the field.DEL |
| Validate | If content types or blockly scripts are used in the iWorkbook, they can be structurally checked for correctness with this button. |
| Undo | Undoes a completed action. (CTRL+Z) |
| Redo | Restores an undone action. (CTRL+Y) |
| Search | Opens the search window. (CTRL+F) |
View

In this area you have the possibility to display a checklist completely or to collapse it step by step.
| Name | Description |
|---|---|
| Collapse to first level | Reduces the view to all existing chapters, which are displayed as green bordered fields. |
| Collapse to second level | Reduces the view to all existing chapters and associated headlines, which are displayed as blue bordered fields. |
| Expand all | Expands all chapters, headlines, questions and all their follow-up questions. |
Translate

In this area you can import and export excel translation tables for this workbook.
| Name | Description |
|---|---|
| Export translation file | This will export the current state of the checklists into an excel-file, where translations can be made for specific fields and scripts. |
| Import translation file | Use this button to reintegrate the Excel-translation-file into the workbook. |
If the workbook will be updated, you have to adjust the translation file as well accordingly to the changes made.
Settings

The license can be assigned in this area. This field is usually only relevant for the setup.
Explorer Basics
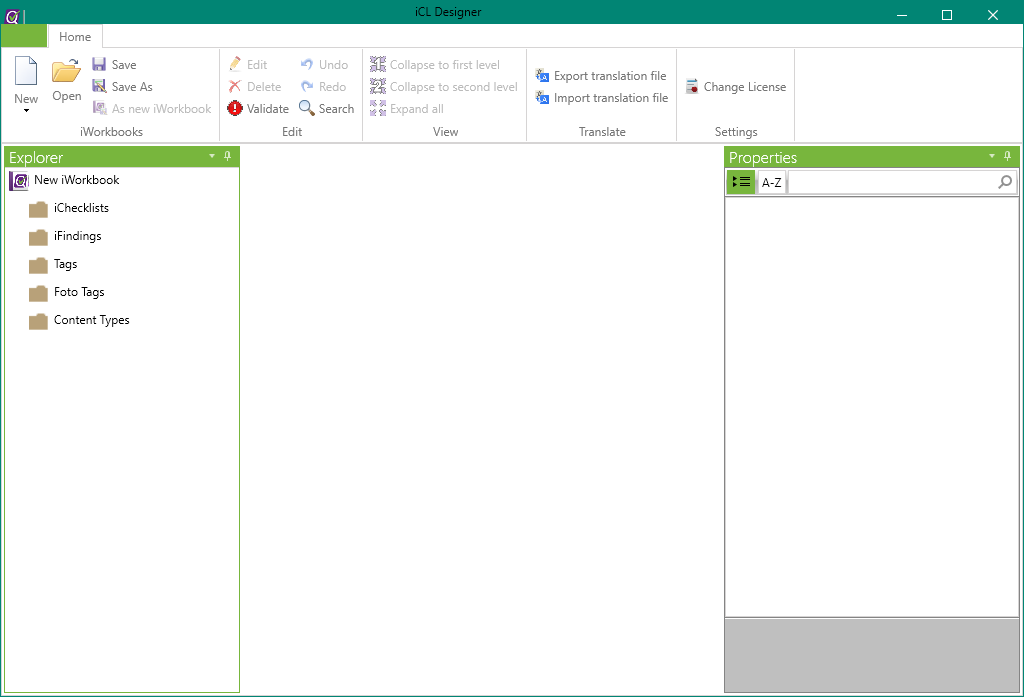
When a workbook is created or loaded, the explorer will display its overall data structure in the explorer view.

You can find more information about these topics on the specific documentation pages:
Document Tab
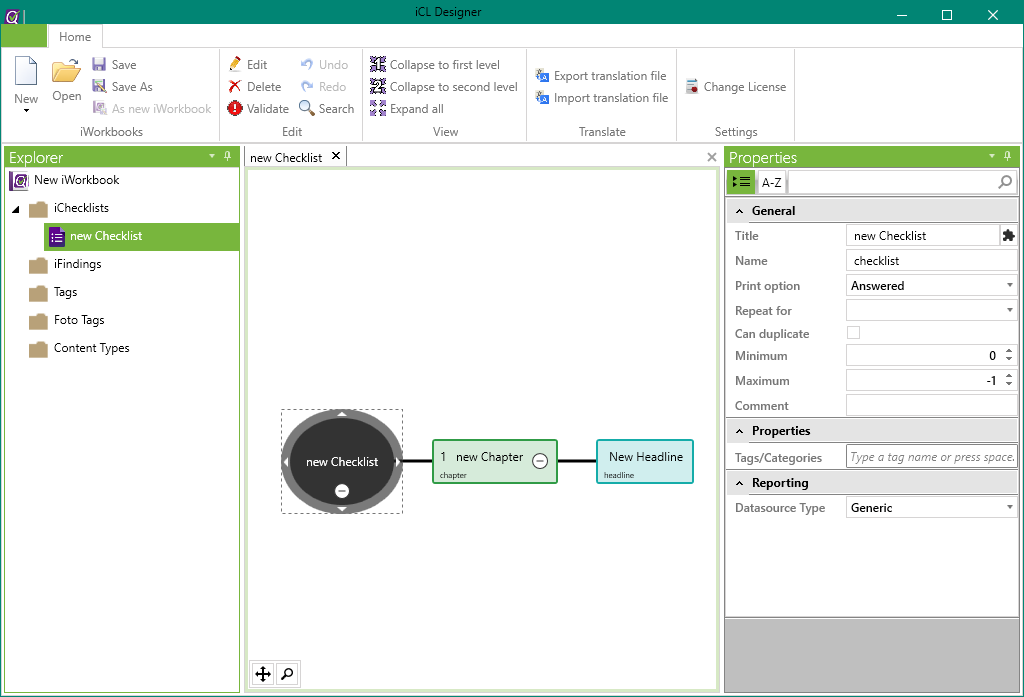
A workbook consists of various documents such as findings and checklists. When you open them, they are shown as a separate document in the central document tab.

In this example you see the checklist question tree when opening the New Checklist in the explorer on the left.
Properties Basics
The properties view on the right allows you to view and edit all relevant properties of a selected item. This item can be the workbook, a checklist, a checklist field, and a lot more.